Wedding Checklist by Month: What to Do and When
The best wedding checklist is a sequence, not a pile. Tasks have to happen in a certain order, because the venue sets the date, the date sets the vendors and the guest count sets almost everything else. Here is the order that works, month by month, with the reason behind each stretch.
Use it as a skeleton and adjust it to your timeline. If you have less than twelve months, keep the order and compress the gaps.
12 months and more: decide the frame
This stretch is about numbers, not details.
- Celebrate, and tell the people closest to you before the news travels.
- Agree the total budget and who is contributing. Everything else depends on it.
- Decide a guest count range: small, medium or large. It narrows the venue search by half.
- Choose two or three possible dates and a season.
- Start a shared inspiration board, with the rule that each image needs a note on why you like it.
- Decide whether you want a planner or a coordinator, even for the day only.
- Tour and book the venue, and read the contract carefully.
- Ask your wedding party. Choose people who will say yes to more than the photos.
11 to 9 months out: the big vendors
- Draft a first guest list with both families.
- Book the large vendors that fill up first: photographer, caterer if not included, band or DJ.
- Start your attire search. Dresses and suits can take months to arrive and be altered.
- Open a shared planning file and set up your budget, vendor tracker and guest list.
- Create a wedding website or a simple information page if you plan to use one.
- Reserve a block of rooms for out-of-town guests.
8 to 6 months out: the look and the logistics
- Choose florist, officiant, cake and hair and makeup.
- Plan transportation, rentals and the rehearsal dinner.
- Order invitations and save-the-dates, or do the save-the-dates now if you did not send them earlier.
- Book the honeymoon and check passports and documents.
- Start thinking about the ceremony: readings, music, vows, order of events.
- Register for gifts if you want a registry.
5 to 4 months out: invitations and details
- Finalize the guest list and gather mailing addresses.
- Send invitations with an RSVP date and a way to reply.
- Order wedding rings and any gifts for the wedding party.
- Schedule tastings and trials.
- Confirm hotel blocks and travel details.
- Check the payment schedule for the coming months.
3 months out: the plan becomes a schedule
- Draft the ceremony and reception timelines.
- Confirm music choices, do-not-play lists and key songs.
- Order the cake and finalize the menu.
- Start drafting your vows and toasts.
- Arrange the marriage license requirements for your location, since rules and timing vary.
- Fit and alter attire.
1 to 2 months out: the final counts
- Chase RSVPs and confirm the final guest count by the date your contracts require.
- Create the seating chart and the meal counts.
- Send the final timeline and shot list to the photographer and coordinator.
- Confirm every vendor: services, times, arrival, payment and contacts.
- Prepare place cards, programs and signage.
- Pack for the honeymoon and make an emergency kit.
- Pay remaining balances according to the schedule.
Wedding week: trust the plan
- Give copies of the schedule and contact sheet to the people who need them.
- Deliver items to the venue and confirm who receives them.
- Pack the day-of bags, with an owner for each.
- Rest, eat, sleep and go to the rehearsal.
- Assign someone else to handle questions on the day.
After the wedding
- Return rentals and collect personal items.
- Send thank-you notes while the memories are fresh.
- Update the legal name documents if you are changing your name.
- Write down what you would tell the next couple. You will forget.
Why dates should calculate from your wedding date
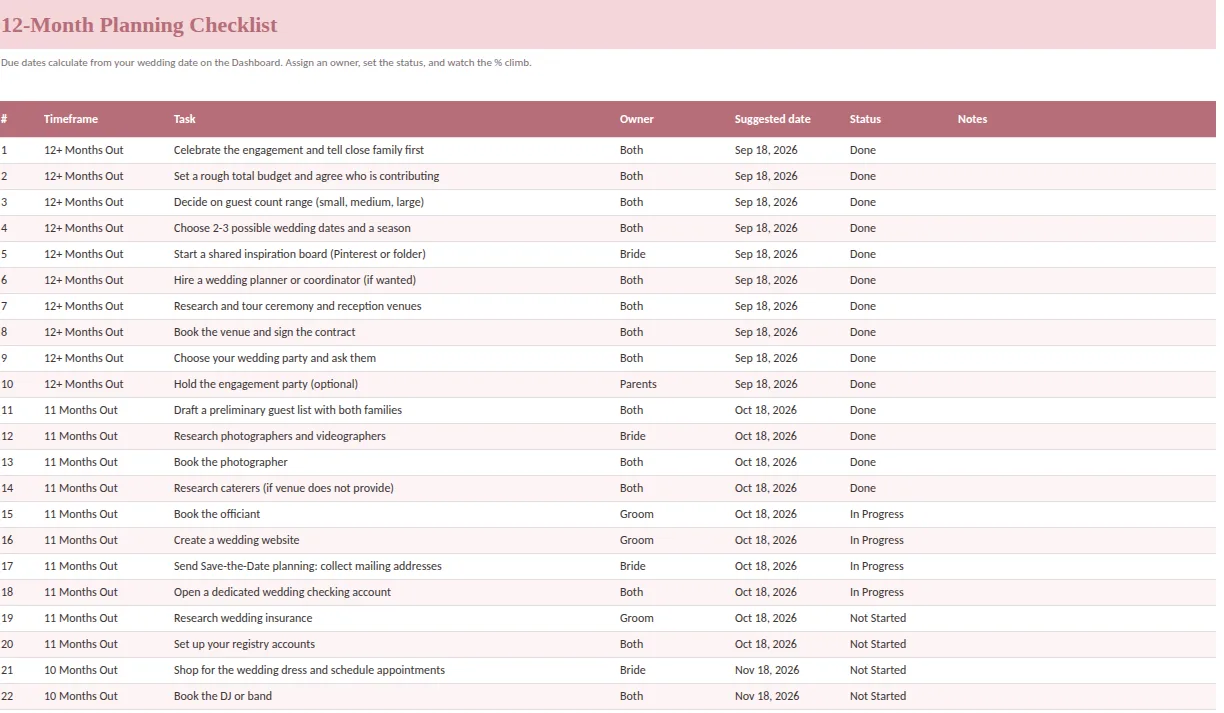
A checklist with typed dates breaks the first time the plan changes. A checklist whose dates come from a formula, such as the wedding date minus the number of months out, moves with you. If you shift the date by three weeks, every suggested deadline follows. This is the single biggest difference between a printed list and a working one.
How to use the list without letting it run you
A checklist is a servant, not a boss. Choose the three tasks that matter most this month and put them where you will see them. Everything else can wait for its turn. If a task does not apply, strike it out and note why, so the list stays honest.
Agree an owner for each task. Many planning arguments are not about the wedding at all; they are about who was supposed to call the florist. A column for the owner turns that into a one-second answer. Review the list together once a week for fifteen minutes, mark what is done and move what slipped.
Finally, look at the percentage complete, not the number of tasks left. Watching it climb is the quiet reward of a plan that works. By the time the wedding week arrives, most of the list should be ticked, and what remains is the pleasant part: confirming, packing and showing up.
A ready-made 12-month checklist
Ever After Planner includes a 120-task checklist, ten tasks for each of twelve stretches from 12 months out to the wedding week. Each task has an owner (both, bride, groom, parents), a suggested date calculated from your wedding date, a status drop-down (Not started, In progress, Done) and a notes column. The Dashboard counts total, done, in progress and not started, and shows the percentage complete.
It works in Excel, Google Sheets and Numbers, and comes with printable pages for the fridge or the planning binder. If you prefer to work on paper, see our printable wedding checklist guide. For the rest of the file the checklist links to, see the wedding planner template guide.
This guide is general planning information. Legal requirements for marriage licenses and name changes depend on where you live.